|
Northern
Eclipse Help Reference |
Matrox MeteorRGB & Sony DXC-390 |
Frame Grabber Installation
First, with the computer turned off, install the Matrox Meteor card in a PCI slot. After the frame grabber card has been installed, the next time Windows 98/Me runs, new hardware will be found and there will be a driver request. The driver can be found on the Northern Eclipse CD (D:\Drivers\Matrox\Mil 5.0 (Meteor)\Meteor\Win9x). When prompted, supply this as the path to the driver. After re-booting, load Northern Eclipse from the same installation CD.
CD-Installation Steps
1/ Insert your Northern Eclipse CD. On most computers it will auto load, but if it does not, double click on the file entitled ECDGUIDE.EXE in the root directory of the CD.
2/ Click on the first Icon “Install Northern Eclipse 6.0”. Once Northern Eclipse begins to install, click on “Next” then, at the Setup Type window, leave the bullet choice at Typical and click “Next”. At this point all of the files will be loaded into c:\eclipse. Click on Finish to complete the installation. Northern Eclipse is now ready to run, but it will only run as offline software (i.e. without camera control). Offline use installation is finished except for some possible personal configurations within Northern Eclipse.
3/ Install the software protection key. A software protection key or
software protection card is included with each new purchase, and is required
for Northern Eclipse to run. The key comes in one of three forms: an ISA card,
a parallel port key or a USB key.
Your computer should be able to accommodate at least one of these and if
we supply the computer we provide you with the appropriate key. The ISA card must be installed in an
8-bit ISA computer slot. We suggest installing the software protection card in
a slot that does not have access to the back plane of the computer case in
order to leave more slots available for other uses (i.e. A hidden slot if
available, or the ISA slot beside the middle PCI slot!). At the present time,
most new computers do not have ISA slots so unless otherwise requested we will
ship the software protection parallel port keys or USB keys. The parallel port
software protection key plugs into a printer port on your computer. A printer
can then be attached to the key, and it should not interfere with
printing. The USB key attaches to
any available USB port on your computer.
Once the key is connected you may need to also install a key driver. If you are running Windows NT/2000/XP you will get the Hardware Protection Key not Found message and Northern Eclipse will not run until you also install the key driver. Windows 95/98/Me does not require a driver to be loaded.
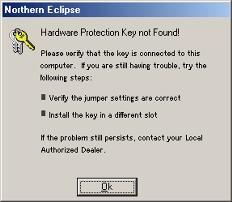
The driver is located on the installation CD and can be installed by selecting “Install Hardlock Driver for NT/2000/XP”
4/ Add
Matrox Meteor RGB Camera support for the Sony DXC-390 Camera
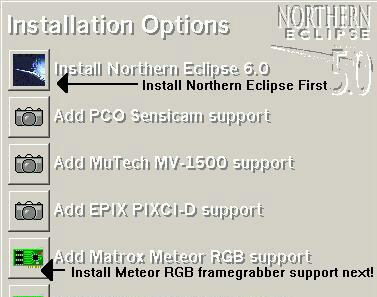
Click on “Add Matrox Meteor RGB support”. Once the Matrox RGB framegrabber support has been added, run Northern Eclipse and then click Acquire, Camera Options, and then Configure, insuring that Northern Eclipse MeteorRGB Driver is highlighted. The following Matrox MeteorRGB Options menu will appear

For the Sony DXC 390 CCD, use the mouse to highlight RGB Color NTSC 640x480(12.5Mhz)* or RGB Color PAL 768x576(14.8Mhz)* depending on the camera model. The camera should now work within Eclipse. Use the Snap or Live Commands to test this.
Enabling DXC390 Integration:
If low light level integration is required (generally used for fluorescent work), be sure the check box Allow Integration to be available is checked. A special cable set, and/or control box, is required for this option to work. With the appropriate options set, click on “Save” then click on “OK” to close the Configure Eclipse Options menu. At this point, Integration will be available.
The serial communication setup and the camera setup must now be adjusted correctly. The default serial communication setup for both camera and software is 9600,N,8,1. In Northern Eclipse, click on Device, and then Serial Options.
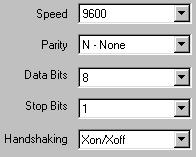
The serial port can be either COM Port 1 or COM
Port2 (Other COM ports are not recommended). Using the buttons on top of the camera
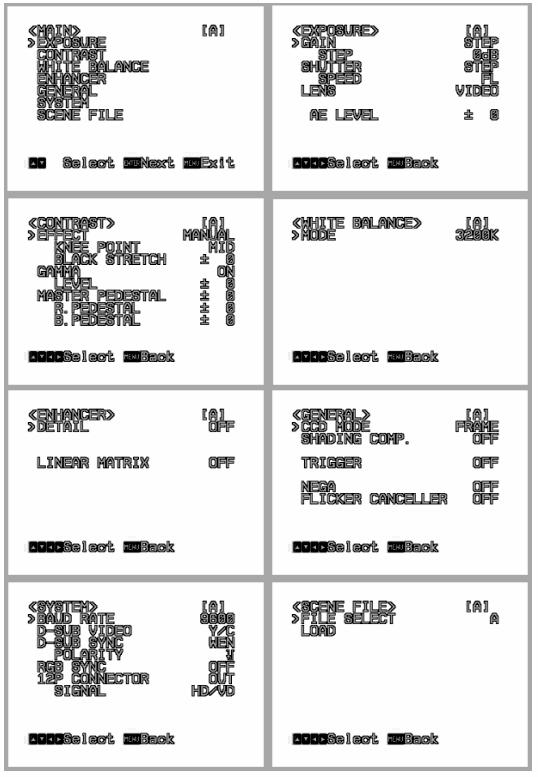
verify that the settings match the following screenshots. The following is a
complete view of the recommended camera settings for the Sony 390 Camera when
setup for on chip integration using Northern Eclipse.
|
See Also |
Meteor RGB & Sony DXC 950 |
|
References |