|
Northern
Eclipse Help Reference |
|
Digital Focus is
available for use with some of the digital cameras currently supported by Northern
Eclipse (DVC, Hamamatsu, Photometrics, Spot, QImaging, and soon PCO, Sony and
Optronics). Generally digital cameras are not fast. At the present time, they
run between 1 Mhz slow and 20Mhz, that translates to frame rates between 1
frame per second to 12 frames per second. At 1 f/sec it is almost impossible to
focus, and even at 12 f/sec, once the exposure is increased, frame rates drop
and focusing becomes increasingly more difficult. To help alleviate these
focusing problems with digital cameras, Northern
Eclipse has a Digital Focus
routine. The Digital Focus routine
works by allowing one to pick a smaller region for faster partial image throughput, or by Binning to increase throughput, or by
sample Reduction or a combination of region selection and Binning or region selection and Reduction.
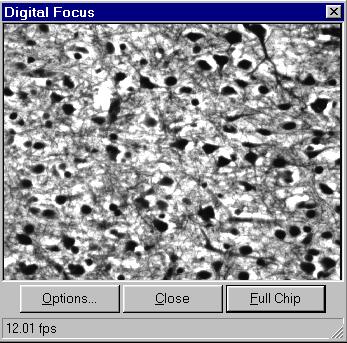
Make the window smaller to increase speed (or fps). Click on the lower right corner of the Digital Focus window and then drag it diagonally to the upper left corner to do this. Another way to speed things up is to crop an area of interest in the image area. This is done by clicking the mouse in the image area and drawing a box by pulling to the lower right and then letting go. After about a half second the image window area will only contain the previously drawn area and the speed (fps) should increase. After focusing, click on the Full Chip button and the image will be in full view again. The Close button will close the Digital Focus dialog box. Closing will also cause an image to be acquired if the checkbox “Snap image after Focus” is checked. If exposure control is available, then the Exposure Control dialog box will be visible and available to adjust while the Digital Focus dialog box is open.
Options
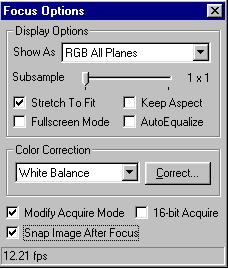
The Focus Options dialog box allows for many options while using the Digital Focus routine.
Display Options, Show
As:
Monochrome Gray -
setting for monochrome CCD cameras.
Monochrome Red -
setting for monochrome CCD cameras but view in red.
Monochrome Green -
setting for monochrome CCD cameras but view in green.
Monochrome Blue -
setting for monochrome CCD cameras but view in blue.
RGB All Planes -
setting for color CCD cameras to view normal colors.
RGB Red Plane-Gray -
setting for color CCD cameras to view red plane only in mono.
RGB Green Plane-Gray -
setting for color CCD cameras to view green plane only in mono.
RGB Blue Plane-Gray - setting for color CCD cameras to view blue plane only in mono.
Brightest Pixel
Plane-Gray -
setting for color CCD cameras to view brightest R, G, or B pixel.
RGB Red Plane-Red -
setting for color CCD cameras to view red plane only in red.
RGB Green Plane-Green -
setting for color CCD cameras to view green plane only in green.
RGB Blue Plane-Blue -
setting for color CCD cameras to view blue plane only in blue.
Subsample: The Subsample option increases frame
throughput as the slider is increased by either reducing the number of pixels
being displayed, or increasing the Binning value. This value (Reduction or Binning) is set in the Acquisition
Driver under Sample Control Method.
The Stretch to Fit checkbox option, when checked, will fit the scaled image to the displayed Digital Focus window and fill the whole window.
Keep Aspect Ratio: This checkbox option, when checked, will keep the image aspect ratio (not distort the image) but may not fully fill the Digital Focus window. When unchecked, the Keep Aspect Ratio option allows the image to fill the Digital Focus window.
Fullscreen Mode: The Fullscreen checkbox, when checked, will fill the monitor screen with the image in the Digital Focus window.
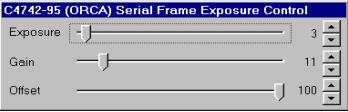
The AutoEqualize Image checkbox, when checked, will auto balance images during capture. This setting should be left unchecked unless lighting conditions are very weak. Increasing Gain, Exposure, and as a last resort Offset, while using Digital Focus or Loop should produce better results.
Color Correction is used to white balance bright field images (normal images) or dark balance fluorescent or dark field images (Note: This option is only used with digital cameras that have a color chip and will be not available for monochrome images). To white balance an image move the microscope slide to a blank area or draw a box around a small white area and click on the Correct button. Once corrected, click on the Full Chip button to see the results of the color correction. (Hint: Color correction does not work if the image is over or under saturated!)
The Modify Acquire Mode checkbox, when checked, will transfer all changes made while using the Digital Focus routine to other acquisition modes. (Loop, Snap, and AutoExpose)
|
See Also |
|
|
References |
Table of Contents |